
That’s it, you’ve decided to get started: you’ve defined the problem you want to solve, identified the solution and how to get there, not to mention having a business plan that will allow you to plan for the coming months/years – and hope, obviously, for future profitability.
You have also determined the basic functionalities of the application you want to publish: so it’s time to get down to business!
Here are the 10 crucial steps to follow to make your app a real bestseller.

1 – Sketch your ideas, concisely and precisely
Your ideas are clear in your head. However, are they for the rest of your team, your collaborators and, above all, your UX designer and your developer, who will be the first to be affected, since they will have to move from the idea to the “proof of concept” (POC), then to the prototype and then to the “minimum viable product” (MVP)?
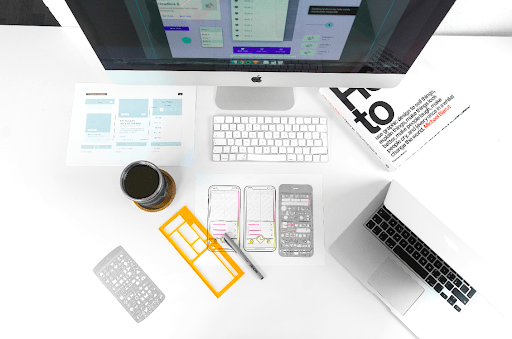
Take a pen and a sheet of paper, and sketch wireframe of the user interface… Your frames should be simple and concise, but extremely accurate and clear.
2 – If you haven’t already done so: recruit the team!
That’s it, your idea is on paper, all you have to do is find the right people to take action. However, who do you really need? If you have in mind to launch a game, for example, you will have to plan another profile than if you want to launch a geolocation app that will find the best hamburger restaurants, or if you want to make an online shop in order to sell clothes.
Also to be taken into account: some developers are also designers, but this is not always the case. Anyway, you will need to have a designer on hand to work on the user interface (UI) and UX before and during development. Finally, you will also need a mobile marketing expert, who will help you increase your visibility on app stores and your number of downloads.
3 – Imagine the “ultimate” version of your wireframe
Once the team is complete, the idea is to brainstorm together about an “ultimate version” of your app. Certainly, it will not be the version you will put on the market, but it is nevertheless rewarding to see how far you can go.
At this point, you’ll need the opinion of your UX designer, your developer, but also everyone who will be involved in the making, marketing and selling of the app. Indulge yourself, and go as far as you wish! Is it done? Now go back, and gradually remove anything that is not essential.

4 – Native, hybrid or web?
If the features you need are clear in your head, you should be able to easily choose between setting up a native, hybrid or web app. To put it simply (you have a full article on the issue here): the native app is the most expensive, but also the one that will give you the best rendering, the best UX.
The web app is the cheapest, and it’s probably more of a backup solution. The hybrid app is a good in-between that allows you to have some of the advantages of the native app without having the cost – which can really be exorbitant. Again, the solution at this stage is to discuss it with your team, including the person who will be working on the development.
6 – Develop a proof of concept (POC)
Before starting to build the prototype, one important step: think about working on a POC. Less advanced than the prototype or the MVP, the POC will allow you to understand fairly quickly if the app can work.
Warning: if you take over the functionalities of an existing application, you may think that working on a POC is useless.
However, unless your project is an identical replica of another (which would probably not be of much interest), proof of concept is an essential step to validate that you are going in the right direction and that the user will have a real interest in consulting your app. So don’t neglect this step! The POC may save you thousands of wasted euros if your project does not make sense.
5 – From POC to prototype…
Is the POC validated? Now move on to the prototype. It’s necessary to start conceptualizing the UI and to review all the possible and imaginable actions that the user may have to take during his “journey”.
The designer has to deliver a fully functional wireframe, which the developer can use in a very concrete way. Remember that your interface as to be user-centric. That means the best UX, without any friction.
You also need to figure out what kind of database you’ll need. How will you use it later? To make it easier for you, draw an ERD diagram (entity relationship diagram): things will look very easier after.
7 – Think about scalability
99% of the time, if you launch an app, it’s in order to reach as many people as possible: it must, therefore, become scalable (in other words, to be used by thousands or even millions of Internet users at the same time).
If you offer for example a photo-sharing application (Hi Instagram!), you will need to provide the necessary storage space for thousands of users to connect and upload their images…
Depending on the complexity of the app, you will also need to see if the developer can take over existing pieces of code, or has to redo everything over again – which will take much more time though.
8 – Integrate analytics
To see if your app is popular, and if it has a chance of being adopted by as many people as possible, you’ll have to analyze the users’ behaviours and figure out where the tipping points are.
You must, therefore, integrate powerful analytical tools, which allow you to know how users behave on the platform. Remember to keep in mind the essential points: the user journey must be perfect, so that the user understands where he (or she) is going, at any point. If some points of friction are critical, changes must be made as soon as possible.

9 – Test and adjust
Have you collected a significant number of feedbacks? Are you afraid of having to do it all over again? Don’t worry: this is what we call “test & learn”, and it’s quite normal. When creating an application, you can never get everything right the first time, that is impossible.
The chances of moving directly from the prototype to a marketable version of the application are still very slim! At this point, keep telling yourself that nothing can be perfect, but that there is still time to change everything.
But if negative feedback is very frequent, and seriously challenges your value proposition, then you should maybe take some time to rethink everything from scratch.
10 – Start your MVP
As Eric Ries, author of the famous The Lean Startup, explains to us “The minimum viable product is that version of a new product which allows a team to collect the maximum amount of validated learning about customers with the least effort.”
The mistake made by many people is to see the MVP as a functional version of the application, nothing more. The MVP must provide a quality UX, it must contain your branding, your design ideas, some of the features…
Finally, it’s probably better if your MVP does not contain all the expected features and only the basic value proposition, but it is imperative that the UX and the design are consistent with your brand image.
Remember that an MVP is something “viable”, so users should not feel like they are dealing with a cheap product. Remember the early days of Gmail, Uber or Deliveroo or Shazam: these apps didn’t have all their options available yet, but they were already working almost as they are now.
In conclusion: don’t forget that the adventure is just beginning… Wait for feedback from your first users, and as soon as you can, start making updates!